Coffee canister
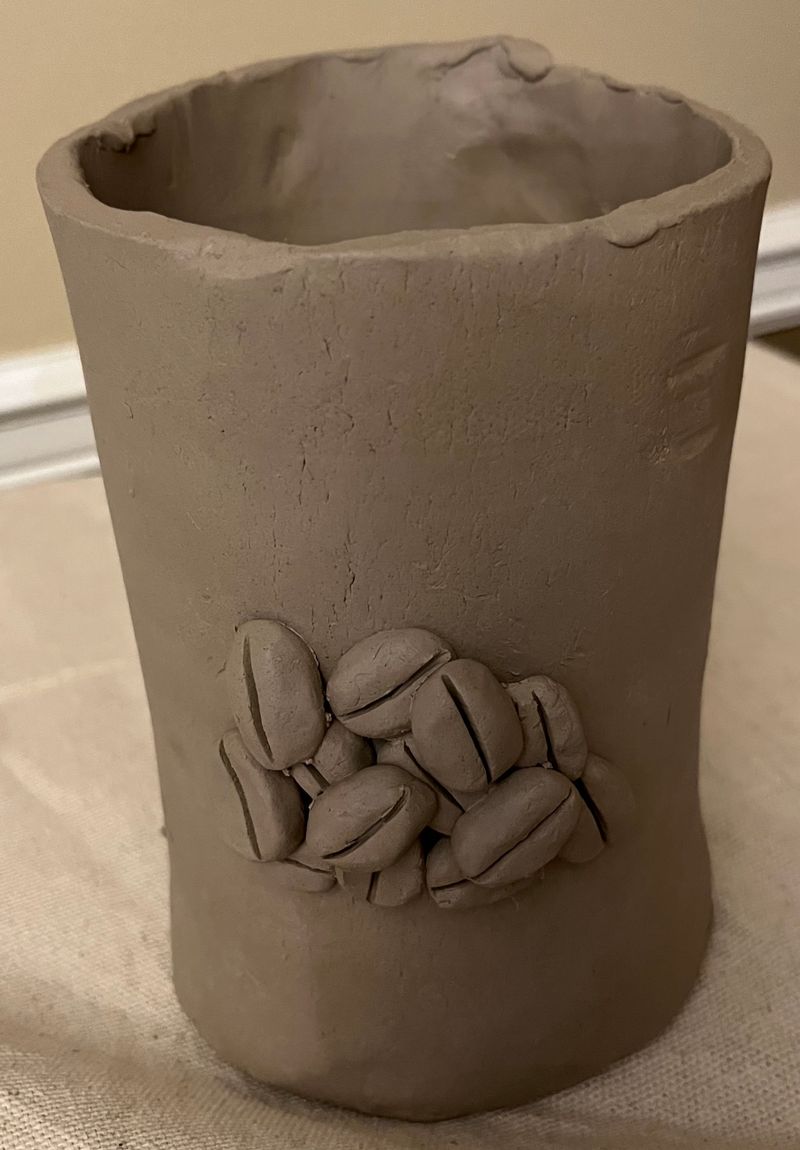
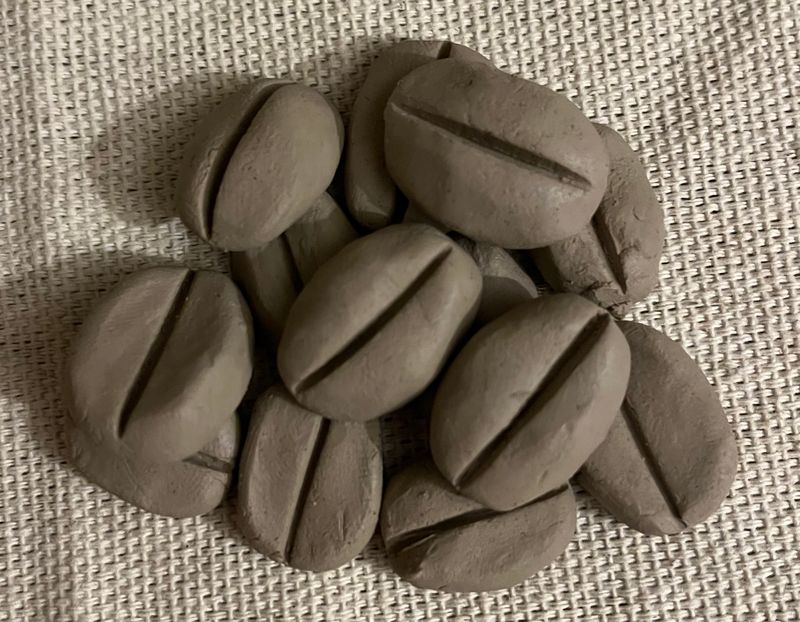
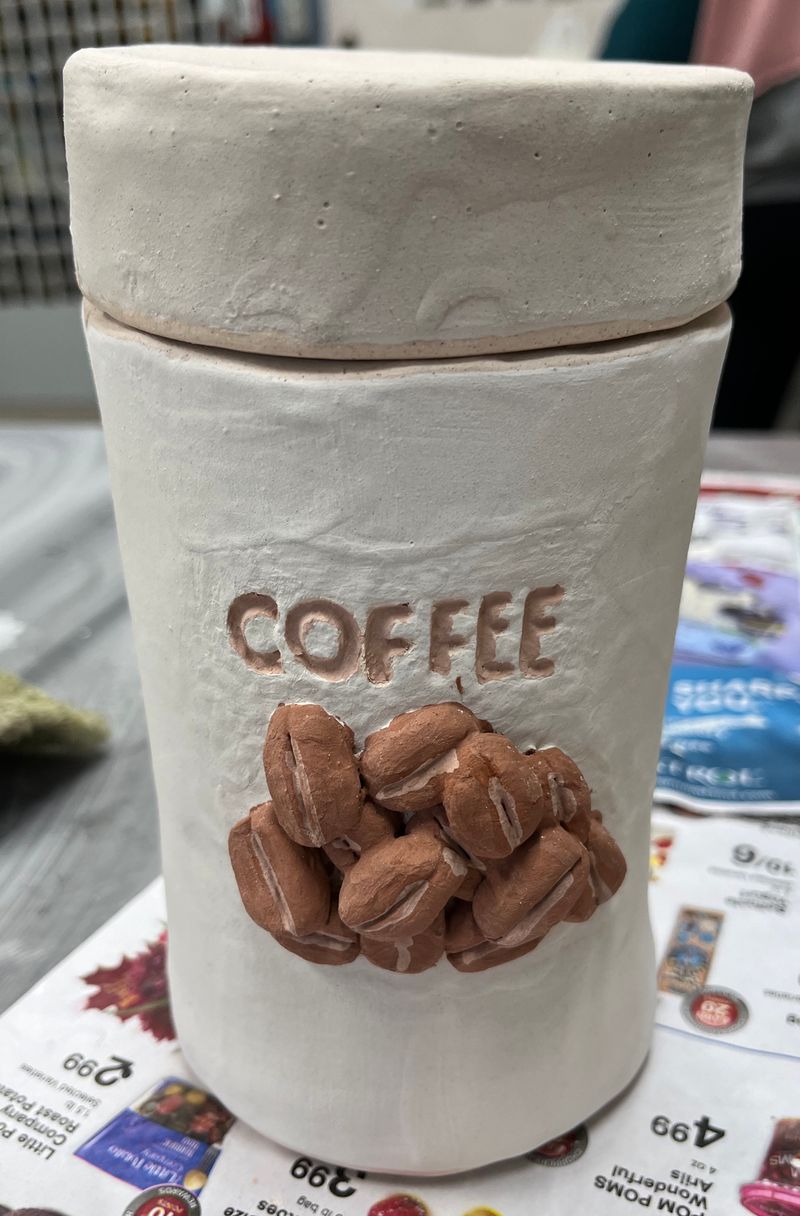
A canister for holding coffee. This one is hand-built using slabs. Initially I just built the cylinder up. After the body dried a little bit, I sculpted beans to attach to the front.
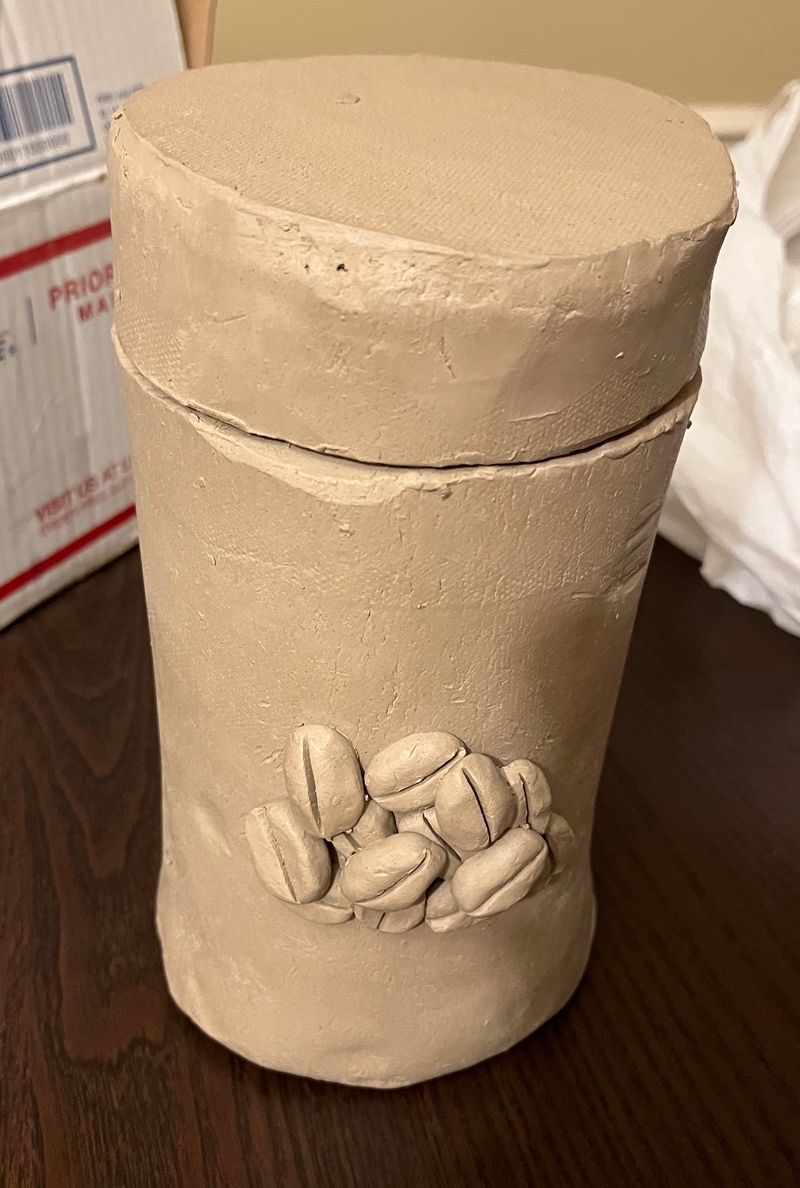
I had meant to build the canister a bit taller and then slice off the top for a lid, but I forgot. So I ended up adding the lid and lip a week or so after building the body. I wouldn't recommend it because the body had already dried and shrunk a bit, so building the lid was risky. If I built it to fit the body as-is, it could shrink and be too small.
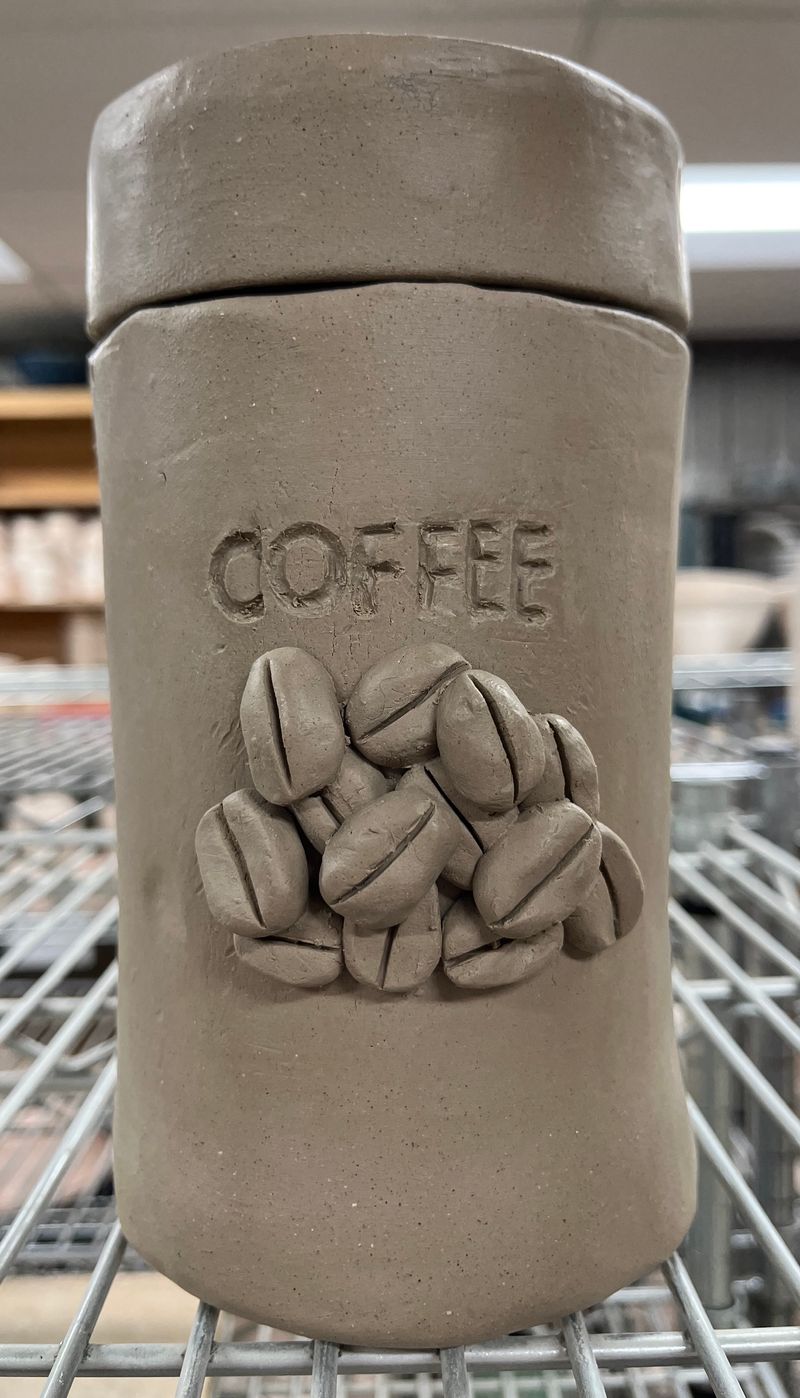
Once it had dried to leather hard, I went back to the studio to clean it up. I wanted to add engraved text, so I found some letter stamps. The clay was too hard to take the stamps, but it left clear outlines and I was able to carve the letters out from that. Once that was done, I set about trying to level out the top and smooth out all the edges. The top ended up still being kind of crooked, but I was happy. After that, it was time to hand it off to the kiln gods.
Once it was bisque fired, it was time to figure out how to glaze it. I wanted the body to be solid white, inside and out, with the engraved text being black and the beans being a deep brown. Glazes at cone 10 firing are kind of a mystery, but for someone like me who has only glazed 2 or 3 times, I still have a lot to learn. Anyway, I looked at the samples hanging on the studio wall and picked out some glazes to use (see below).
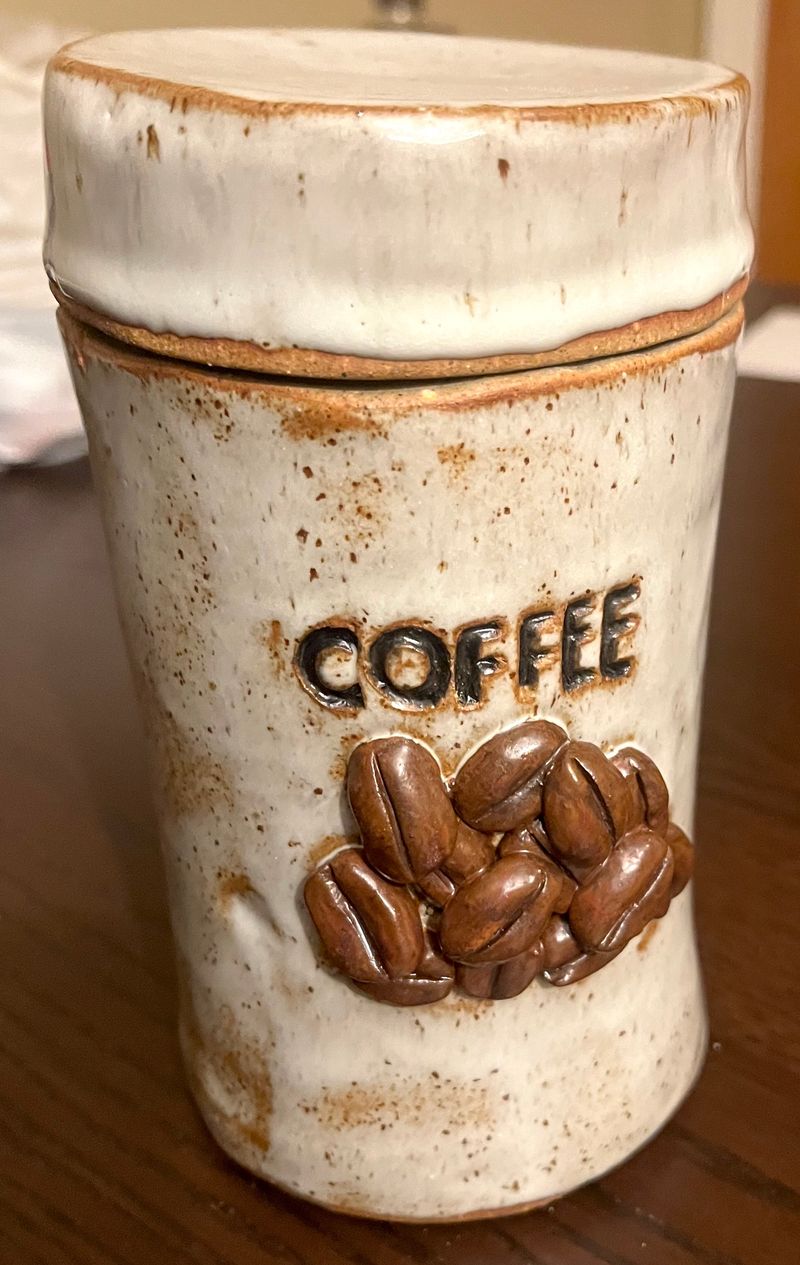
I had intended for the body to be solid white, but this kind of speckled look is neat. I brushed the glaze on the exterior because the alternative was dipping it and I was worried I wouldn't be able to get all of the white off the beans. There are three brushed-on layers, but I guess that was still too thin. Oh well, no complaints from me!
I am especially happy with how the beans turned out. I was really hoping for a sort of matte brown (or at least less glossy than typical glaze), and it came out just right! They have two brushed-on coats of a red glaze and this brown outcome is so good. I also brushed in a single coat of a little bit of black around the grooves. It seems to have worked out well!
Glazing
| section | glaze | hope | outcome |
|---|---|---|---|
| interior | very white | very white | quite white |
| body, base | G white | white | thin white with speckles of clear over the fired body |
| body, letters | St. John's black | black | black |
| body, beans | shaner red | brown | matte brown - PERFECT |